How to Transform Your Content With a Parallax Shift
Doubtless, you’ve seen it dozens of times: a still photograph within a video that somehow manages to appear three-dimensional. It displays depth, varying planes of motion, and perhaps even animated particles or lighting effects.
This post originally appeared on Visual.ly

Doubtless, you’ve seen it dozens of times: a still photograph within a video that somehow manages to appear three-dimensional. It displays depth, varying planes of motion, and perhaps even animated particles or lighting effects.
While our initial reaction is to assume the images we’re seeing are actually video, or perhaps finely detailed 3D animation, there’s always some sort of subtle “tell” that gives it away and lets us know that we’re peering into an odd space between dimensions. This is where sometimes incredible iconic imagery can be seen coming to life with high style and depth that bring with them sensations of “aww” and sometimes even a bit of uneasiness.
For any aspiring motion graphics artist out there, this article will display some principles and ideas behind 2.5D motion control and perhaps inspire you when you go onto your next project that calls for this sort of thing. For everyone else, think of this as a “behind the scenes look” at a little piece of movie and video magic.
Take a couple of minutes to watch this video and right away you’ll notice many of the themes mentioned earlier: implied depth, mass, virtual lights and sweeping camera moves. However, the bulk of these effects were not achieved using high-end 3D animation software, but Adobe Photoshop and After Effects. Here’s a quick rundown of the process.
1. The parallax effect—a brief history.
Along with being another handle for the 2.5D photo effect, the parallax effect (or parallax shifting, as it’s also known), is what happens when you create the illusion of depth with completely flat, two-dimensional objects by moving different background and foreground elements at varying speeds. Foreground objects move fastest, mid-ground slower, and and the far-off background elements the slowest.
This effect was prevalent in side scrolling video games from the 16- and 32-bit eras and known as “parallax scrolling.” It would scroll different pieces of the background and foreground at differing speeds to create the illusion of depth, without actually utilizing 3D space.
For a real-world example, look out the window on your next train ride. Posts and automobiles closest to you move at break-neck speeds, while objects further from view move much slower (far-off buildings, trees or mountains, for example).
Parallax effects in animation were created by taking multiple layers of background oil paintings on glass, and situating them on multiple planes vertically with a camera pointed straight down at them. Each painting was moved at varying speeds depending on the implied distance from the camera. One of the most famous examples of these early systems is Disney’s multiplane camera from 1937. The device could capture up to seven layers of artwork with a moveable camera.
2. Creating the effect today. Flat images are flat. Enter Photoshop.
The first step in creating our implied depth lies in separating the subject of our photograph from the background and other elements. In the following example from a video we created for a client, we’ve got two welders working on an I-beam.
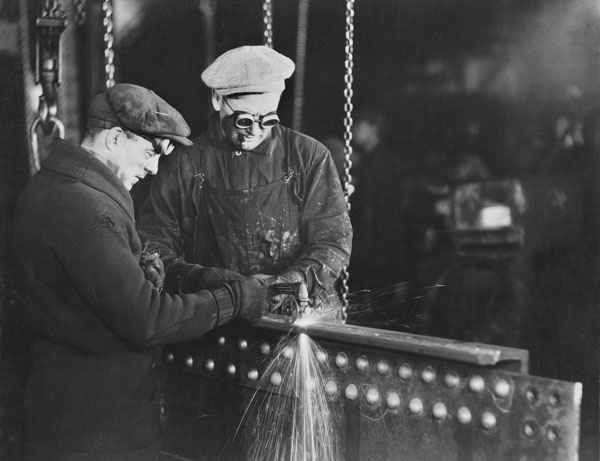
First, we need to prepare the file. Each piece we’d like to have moving at different rates needs to be cut out from the background. Once finished, the spaces behind each element need to be painted over, so the original object doesn’t appear flat against the background behind its separate counterpart in 3D space.
3. Adding depth. Arranging layers in 3D space.
Once we’re finished slicing up the image in Photoshop, it’s time to import it into After Effects to add that much-needed depth. After all the layers are converted to 3D space, we pull them out to different points on the Z-axis and add a 3D camera, which will be the only object that changes position on the timeline. We’ve also thrown a 3D light and particle effect in there to help add some life to the scene and create the illusion of sparks flying off the welding torch. The animated text tells the story of this particular video, and is also situated in 3D space.

4. Adding Life: Animating the Scene
Once everything has been arranged in 3D space, we go about the business of animating the intensity of our 3D light with keyframes to make it flicker in time with the welding sparks, add an ambient light to keep the scene from becoming too dark, and animate the camera along a motion path to create the parallax shift and complete the effect. We also pre-composed the chains that are hanging from the ceiling, and gave them some subtle motion using the puppet tool in After Effects. Once finished, the piece looked like this.
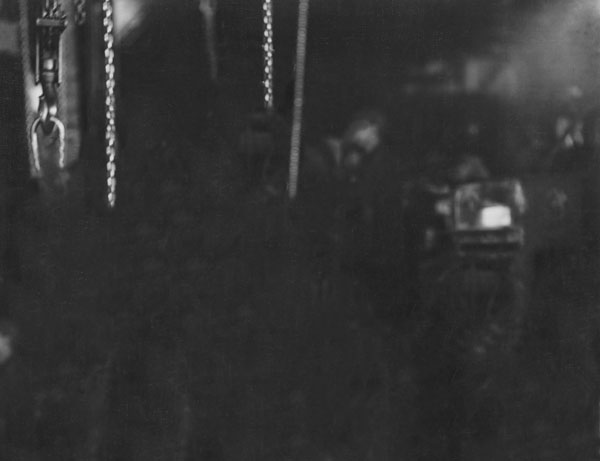
And here’s an example of what happens when we rotate the camera outside the normal view and pull the layers apart to illustrate how the scene works.
And that’s about it. Simple scenes like the dissected example above usually contain between 10 and 20 layers, but you can get as complicated as you want and have upwards of 50 to 100 layers of depth. Ocean, mountain and forest scenes offer tremendous possibilities, but don’t limit yourself. There are tons of tutorials out there on how to create this effect, and even more examples of it in use.
So what are you waiting for? Grab your camera and make something incredible!
Contently arms brands with the tools and talent to become great content creators. Learn more.