Content Hack: How to Create GIFs Small Enough to Embed on Twitter
Here’s a walkthrough of how to make GIFs from existing content, using a recent infographic from LinkedIn, created on the Visually Marketplace.
This post originally appeared on Visual.ly

Twitter made waves in the content marketing world again last week with the addition of native support for GIFs, which can be uploaded via the Twitter web client and iOS/Android mobile apps, as well as third party clients like Hootsuite, Buffer and TweetDeck.
Since GIFs are already wildly popular on social networks and image sharing sites, brands quickly hopped on the new trend:
https://twitter.com/generalelectric/status/479325216318160896
As with all new features, there’s a bit of a learning curve – and for marketers the key will be to build a quick and easy workflow for creating GIFs without killing bandwidth (the files can get large quickly, and most social / sharing sites have 1, 5 or 10 MB file size limits).
Here’s a walkthrough of how to make GIFs from existing content, using a recent infographic from LinkedIn, created on the Visually Marketplace:
Select the right piece of content
GIFs are designed to quickly get across a point, joke or idea. Like much of the content created for sharing on social media, they are a form of micro-content.
To create a GIF, you need to find something that can be “micro-contentized.” In other words, the story contained within it should be easy to break down into smaller stories or ideas, and the design should be easy to pick apart.
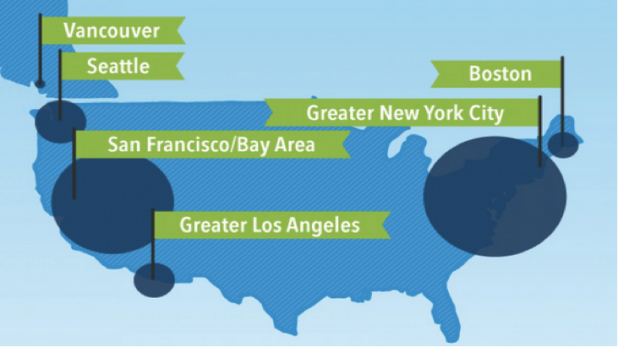
This infographic from LinkedIn profiles the top employers in North America, including company size, industry, and geographic location:

Create separate images / screen grabs
For the LinkedIn example, we decided to use the title section, list of top 10 companies, and a map of where they are located.
 If you’re working in a photo-editing program, simply open the infographic, crop each section down and save separate files.
If you’re not a designer or have limited design experience, you can use a standard screen capture program to capture the images, and then upload to a simple web editor like Pixlr or PicMonkey if you need to touch them up.
Convert the images to a short-form video
In order to create a GIF, you’ll first need to convert the images into a video. There are a few ways to do this, but the easiest is to simply take advantage of a feature in Photoshop and Keynote that allows you to convert slides into video.
First, drop your images into separate slides. Make sure they are centered and fill the entire slide, otherwise when you create the video the edges/margins will show up.
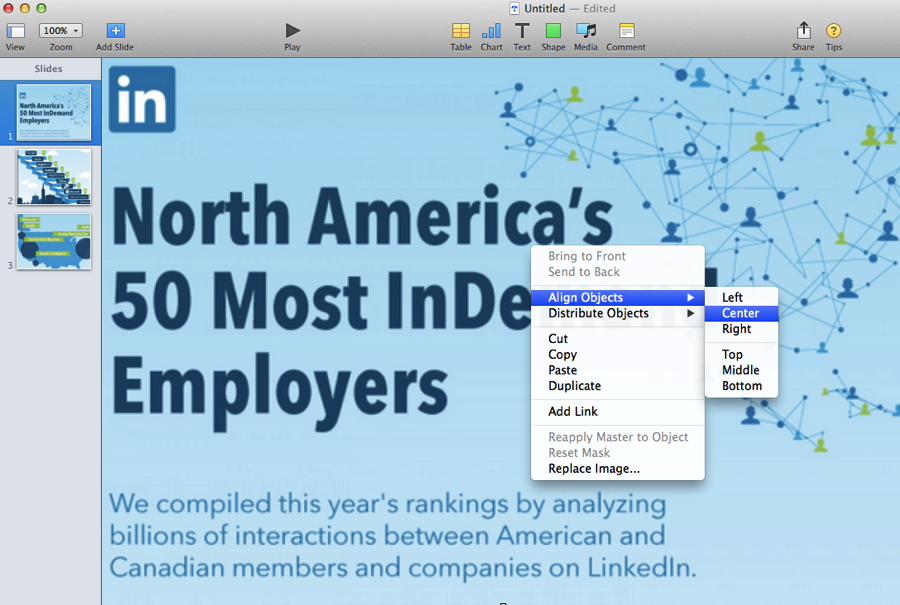
Once you’ve lined up the images on separate slides, click the “File” drop down at top left, and then select “Export to QuickTime”:

Then just open the file to make sure it plays as a normal video, and check out the run time.
Time to make your GIF
For this step, you’ll need a GIF program or app.
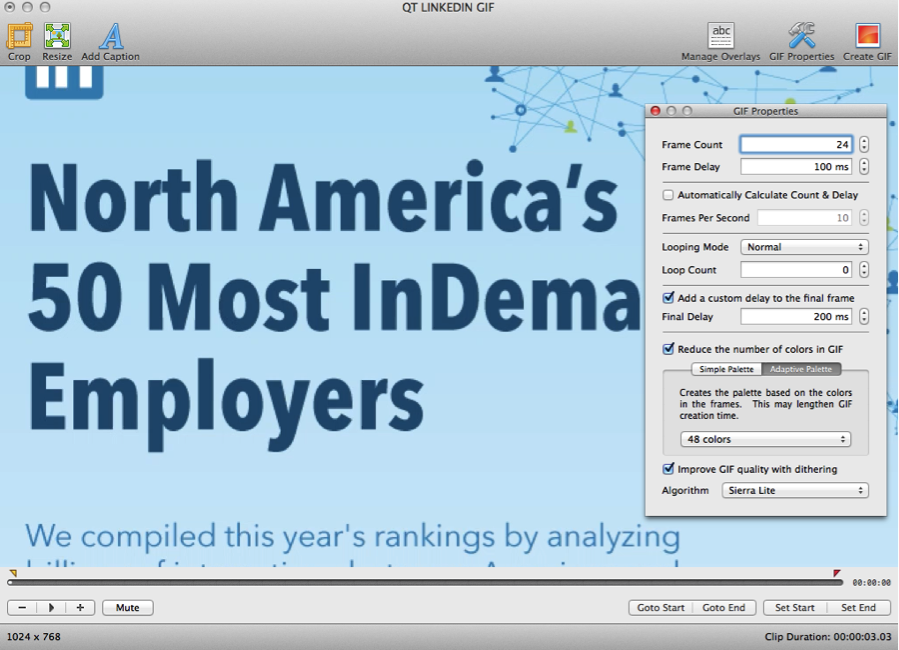
We used GIF Brewery ($4.99 via the Apple App Store) but there are a variety of similar tools or apps that work pretty well.
Run the program, and then open the video file you just created. Once the video file is loaded, adjust the settings. You can play with the total number of frames and frame rate to speed up or slow down the GIF loop. The important thing to remember is that the more frames and slower it loops, the larger the file size. Pay attention to that when you export the file.
One other tip is to reduce the number of colors used, for the GIF format a more basic color format is fine since most people won’t be viewing it in high resolution. This will reduce file size significantly.
Then, generate the GIF and check it for playback. Make sure it doesn’t play too fast or too slow. Depending on the content not all of your GIFs will be at the same playback rate, so use your best judgment.
Most of the time, if you’ve simplified the color palate and don’t include an overwhelming number of frames, the file size will be under 1 MB. That’ll reduce the stress of having dozens of huge files on your computer, as well as the upload and distribution time when you’re sharing via your social channels and website.
Finally, double check how the GIF actually looks online
This last step is important. Anytime you create a GIF it’s probably a good idea to see what it’ll look like natively embedded into a social channel.
Our favorite place to check these is on Pinterest, because you can easily experiment on a private board that only you and your team have access to. Once you’ve checked the GIF for playback, simply queue it up on your respective channels, and you’re all set.
 Here’s the final GIF as shared on our Twitter feed:
Who / Where Are the Most In-Demand Employers in North America? http://t.co/gusV6nXedm http://t.co/iUzDQjvKPn
— Visually (@Visually) June 21, 2014
Note: not all social networks currently support GIFs: make sure you know which of them do before sharing.
Want your business to tell great stories like this one? Contently gives brands the tools and talent to tell stories that people love. Learn more.